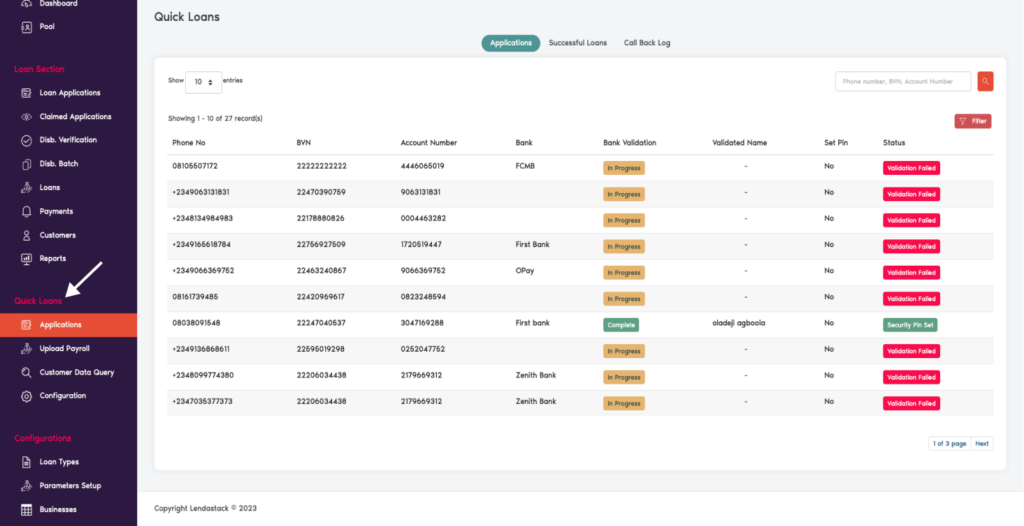
To access the product in the loan module, scroll down on the side navigation directly under loan section, you will see the feature titled (Quick Loans)
Quick Loans Set-up
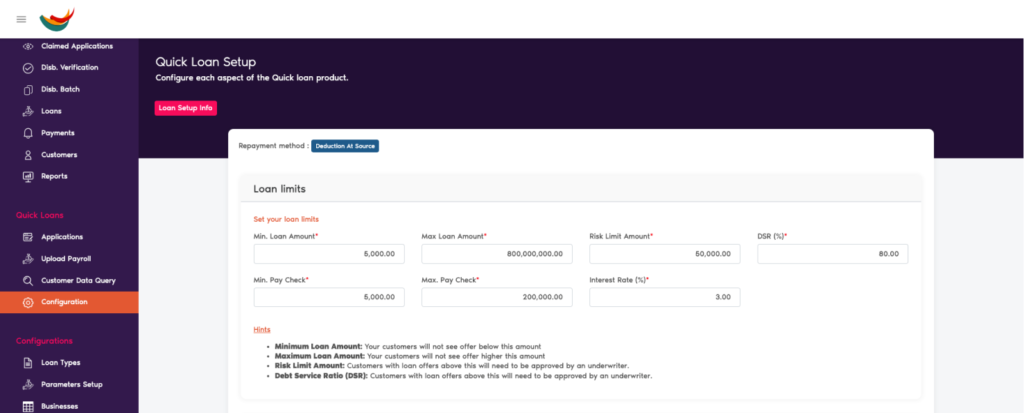
Under Quick Loans click on configuration which brings up a form with title
Loan Setup info on the screen. Here you can set your loan limits, and make adjustment as desired, such as Minimum Loan Amount, Max Loan Amount, Risk Limit Amount, DSR (%) ETC.
Loan above risk limit: require an underwriter to approve while loans below risk limits are found under disbursement batches.
Application fees
Creating A New Loan Product or Type
Application fees
Fee : This identifies the type of fees you are charging (sms charges, mgt fees, atm charges etc)
Fee Calculator : Choose between deducted upfront or capitalized
Fees Type : Choose fees should be charged on a percentage or flat-rate
Amount : inputting the amount you want to be charged

Loan Calculation Constraints: Choose the loan tenors that suit you best. Tailor your preferences with a flexible range, spanning from 10 to 24 months
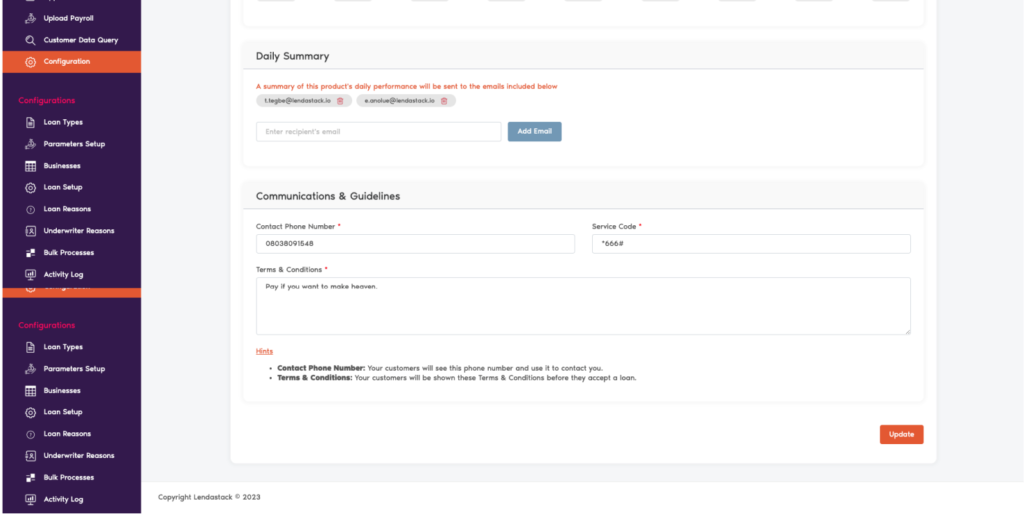
Daily Summary: A summary of this product’s daily performance will be sent to the emails included in this section. Enter preferred email to the textbox provided and click on the “Add Email” button to submit.
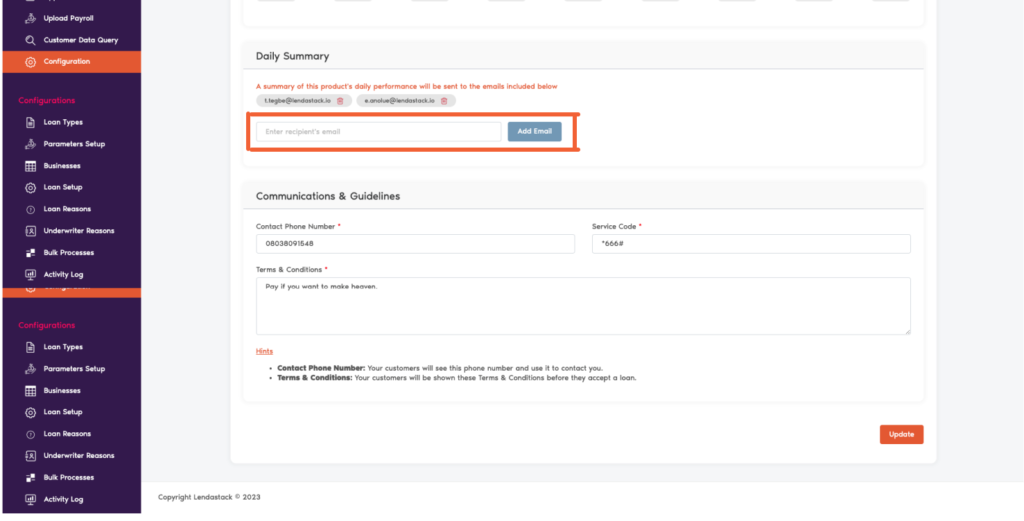
Communications & Guidelines: Here you input the necessary information in the textbox provided and labelled as listed below
Contact Phone Number
Service Code
Terms & Conditions
Click on the update button to save the credentials on the system.
Upload Payroll
Navigate to the top of the side menu, select ‘Upload Payroll” under Quick Loans. Once the page opens, click ‘Here’ on the right to download a payroll sample template.
Once your document is ready based on the template provided, drag & drop the document or click on Upload to upload payroll information/document on the page.
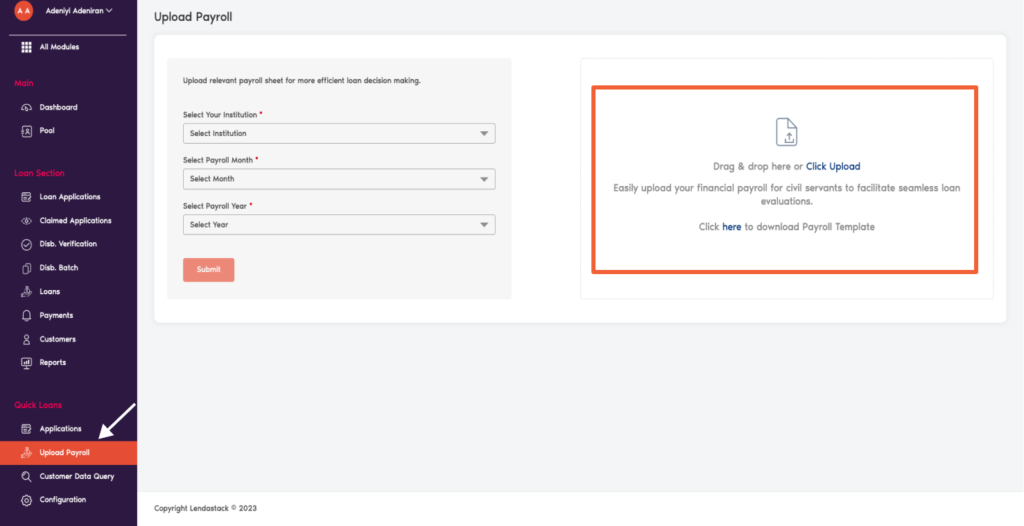
Creating A New Loan Product or Type
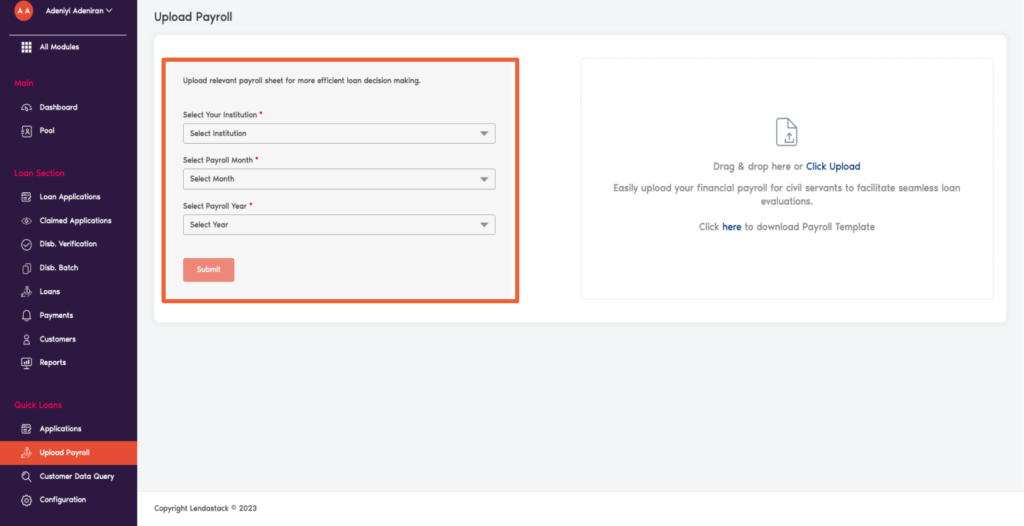
On the left side of the Upload Payroll screen, there is a form to be filled and submitted along side the uploaded document. Form details are as follows;
Upload relevant payroll sheets for more efficient loan decision-making.
Select Your Institution: Click on the drop-down button to select the organization you are got the payroll from
Select Payroll Month: Click on the drop-down button to select the exact payroll month
Select Payroll Year: Click on the drop-down button to select the year
Click on the submit button, and email will be sent to you to confirm if the the upload was successful or not to the email provided while configuring.
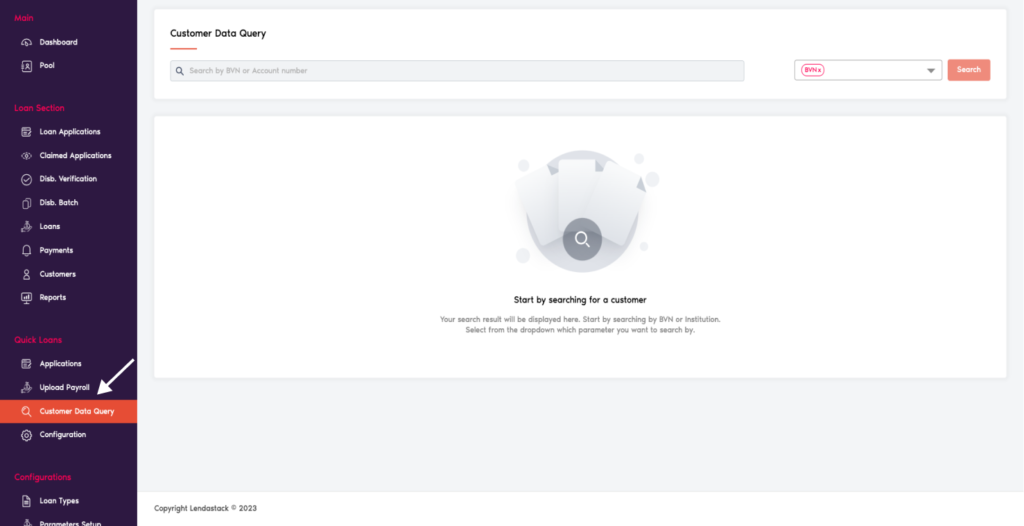
Customer Data Query
Query the data by searching via customer BVN or Account number.
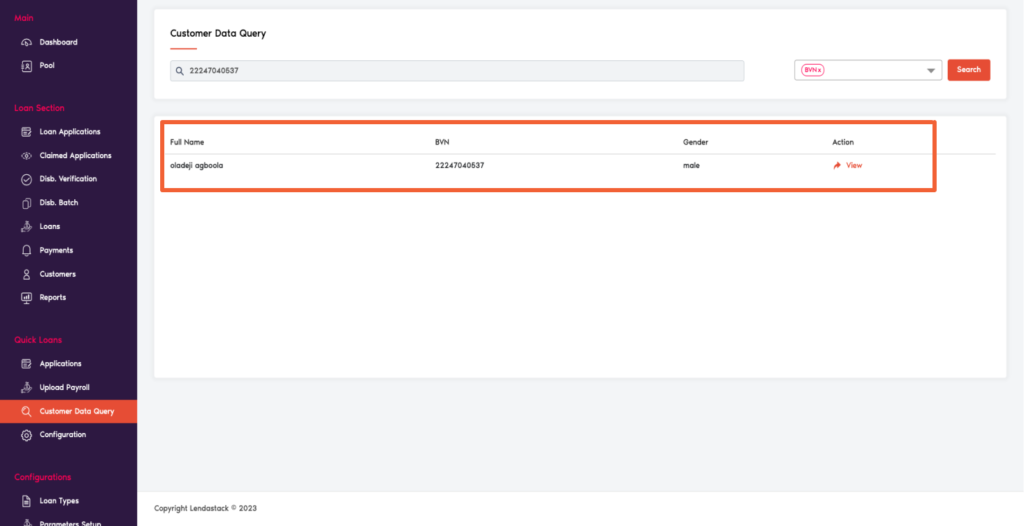
Search result is displayed as seen below and user can click on the “view” button to see more details about the customer
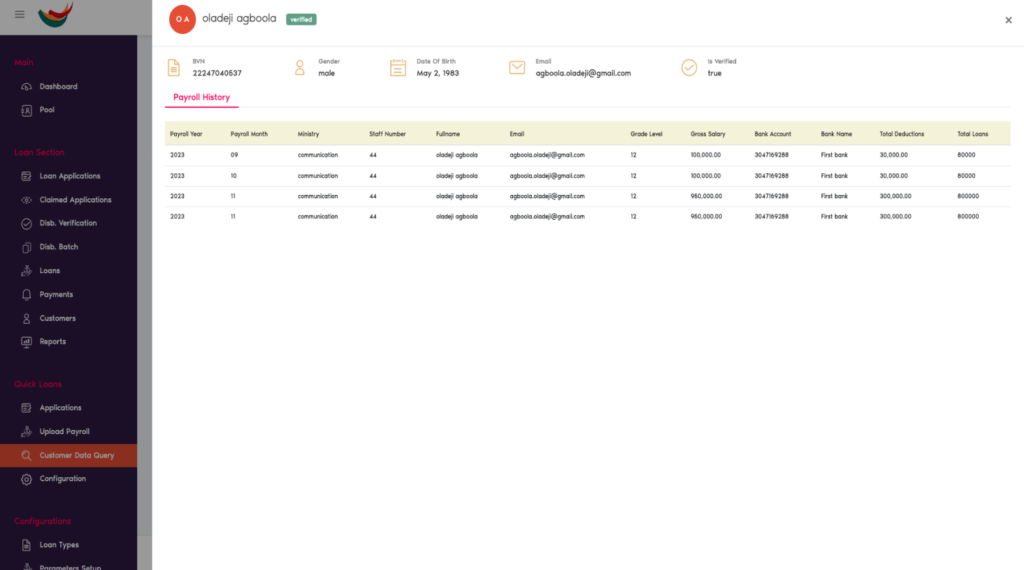
Application
In the application there are three types of headings
Applications
Successful Loans
Call back Log
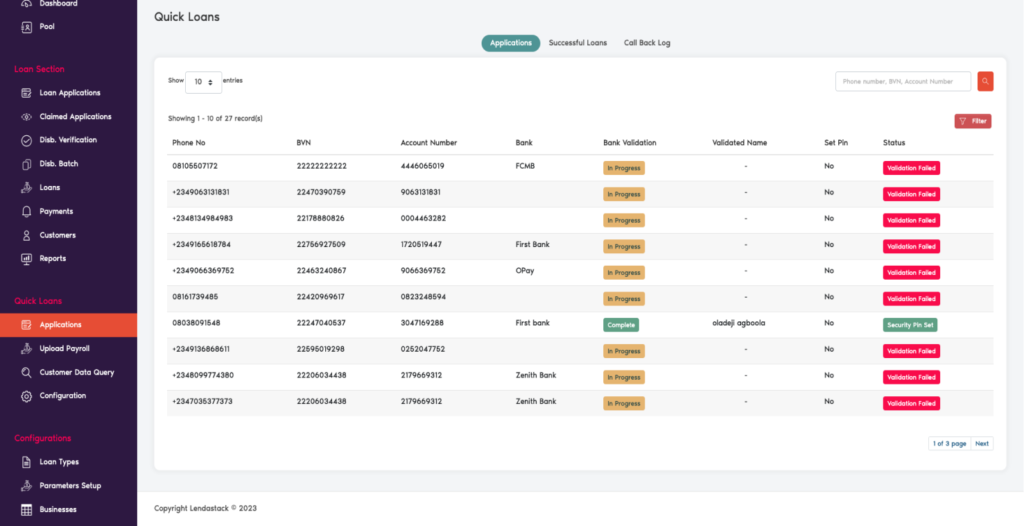
On the Applications screen, users can view initiated requests and access comprehensive customer information.
Initiator’s phone number
Bvn
Account number
Name of bank
Bank Validation
Validated name
Set pin
Status
If you encounter ‘Validation Failed’ on the status bar, it indicates a mismatch with the provided information and the BVN data. After completing validation, proceed to set your security pin, also known as the PIN.
Successful Loans: Click here to view all approved loans
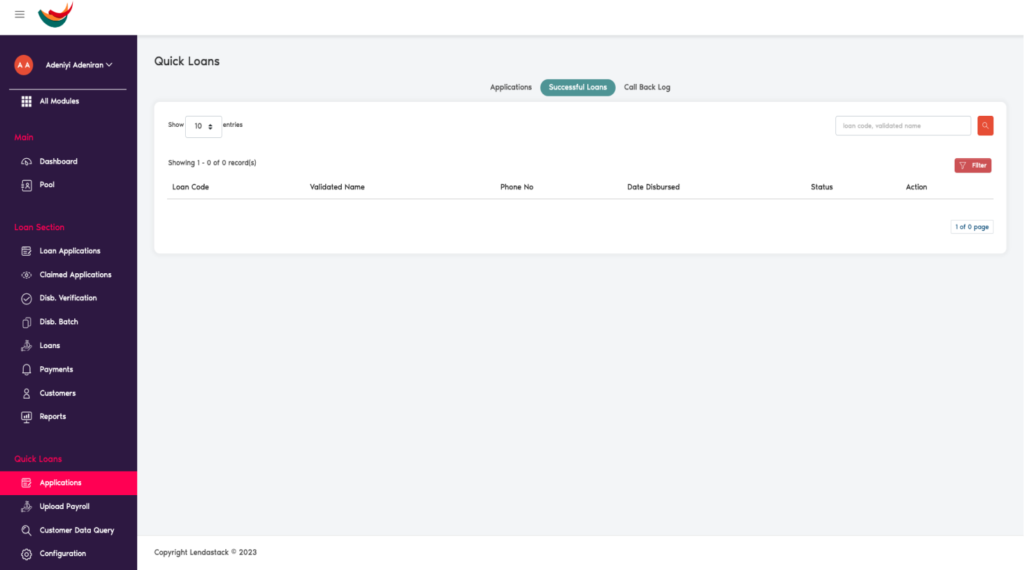
Call back Log: Once you click on call back you will notice the headings as listed below
Validated name: the name of the customer
Phone number: Customer’s phone number
Date requested: the date of the request
Stage: the level of progress on the application
Status: this help in know the current state of the application
Action: Click on the view button to drill down into customer’s information and treat. The individual in charge will reach out to the customer to help fix the issue, this also gives the customer’s opportunities to ask questions
