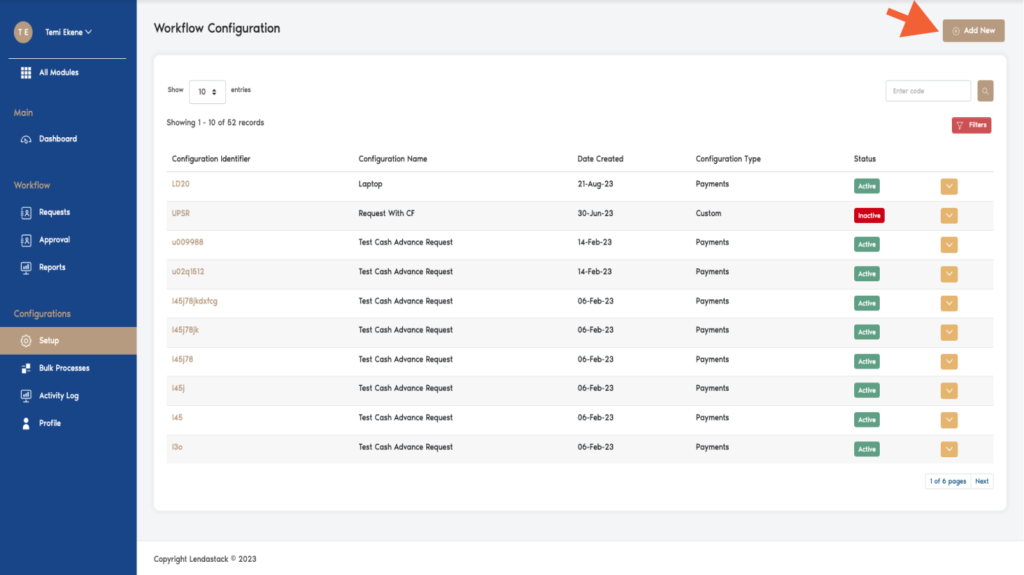
This contains the Configuration Setup, Activities log and Bulk processes and Profile of the workflow module. To create a new setup, click the “Add New” button on the top right corner of the configuration screen.
A form modal is displayed which contains a list of text fields to be filled. All fields with an asterisk(*) are compulsory.
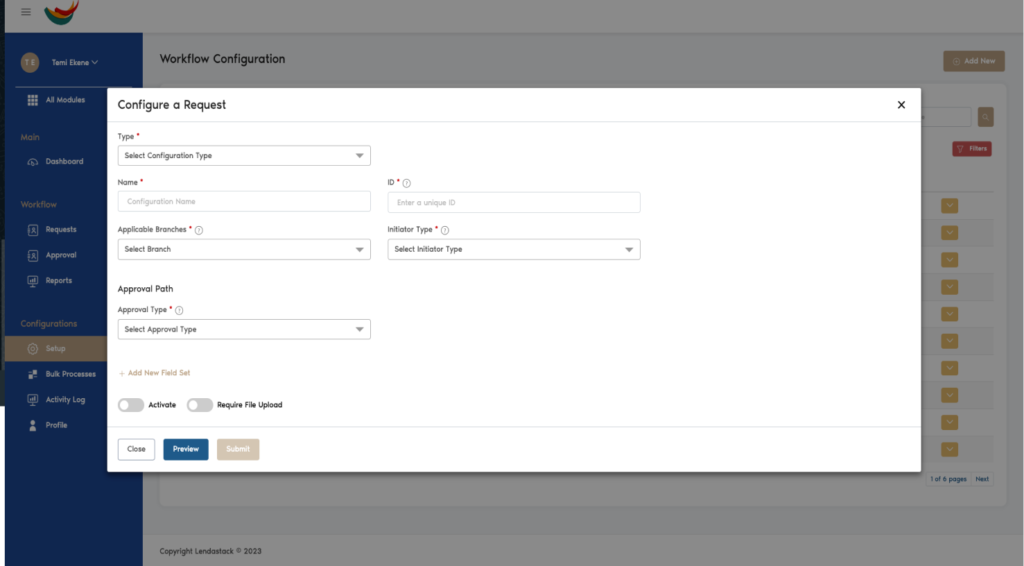
Configuration Type
Custom – This request caters solely for non-financial related requests.
Payments – This request caters for financial related requests only
Configuration Name: Unique name for the configuration
Unique ID: Set of alphanumeric codes that makes a request standout
Applicable Branches: This is a list of branches where this configuration can be used
Initiator Type: This is a class of users that can create requests using this configuration. They are either Roles or Teams.
Approval Path: The class of users that can approve requests of this configuration.
Configuration Types
There are two types of configuration
Custom Configuration: This request caters solely for non-financial related requests. Select “Custom Requests” and fill in the required fields as listed below.
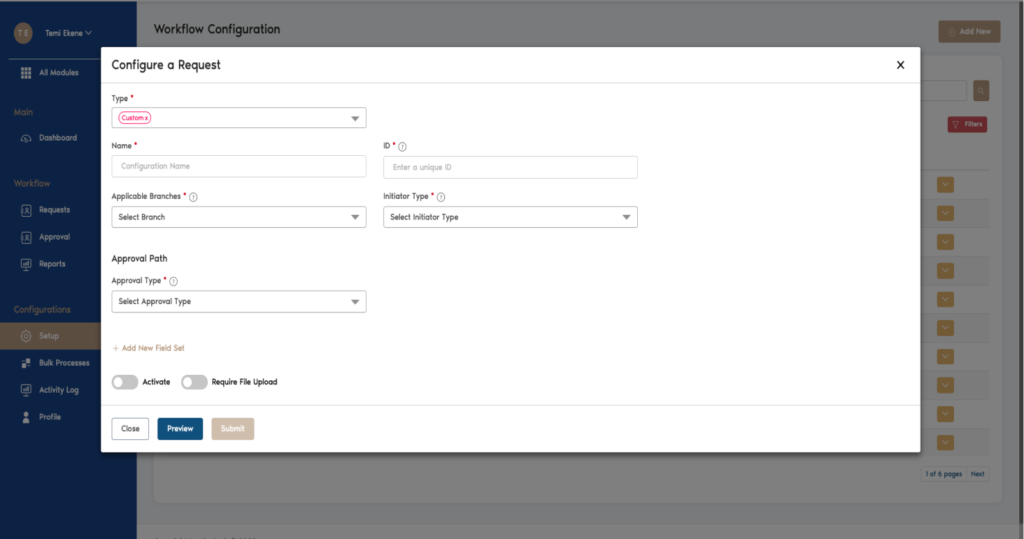
Name: Choose a name for the request eg.(sick leave, annual leave etc)
ID: Set of alphanumeric codes that makes a request standout
Types of initiator(Team and Role): The class of users that will be able to view the request, you can choose either one but not both
Approval Type: The class of users that can approve requests of this configuration.
Applicable Branches: This is a list of branches where this configuration can be used
Initiator Type: This is a class of users that can create requests using this configuration. They are either Roles or Teams.
Approval Path: The class of users that can approve requests of this configuration.
NB: For additional information (if required ), click on the “+Add New Field Set” button highlighted below. This populates the screen with form fields set. Enter a fieldset name and field set note.
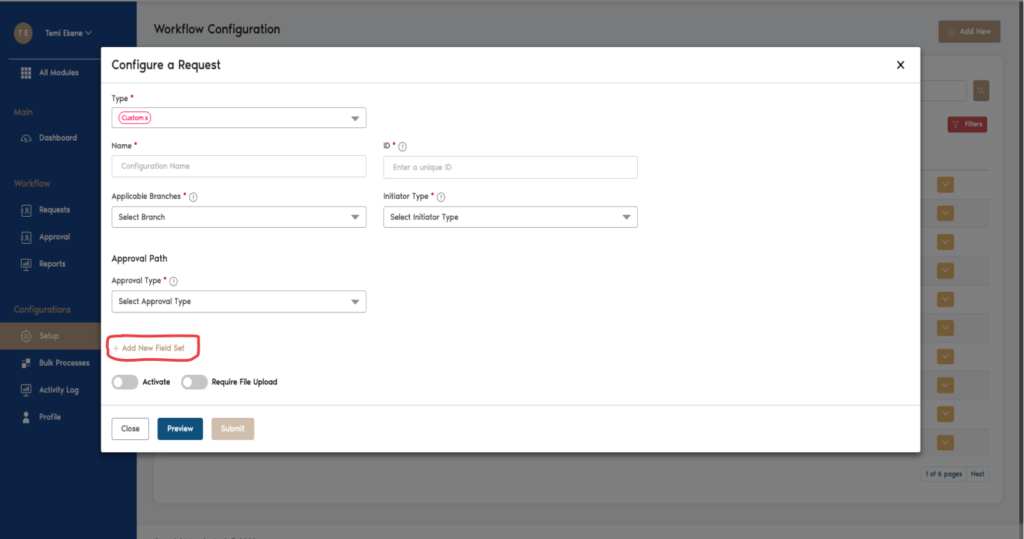
After filling in the field set name and field notes, go ahead to click on the “+Add New Field” button highlighted below.
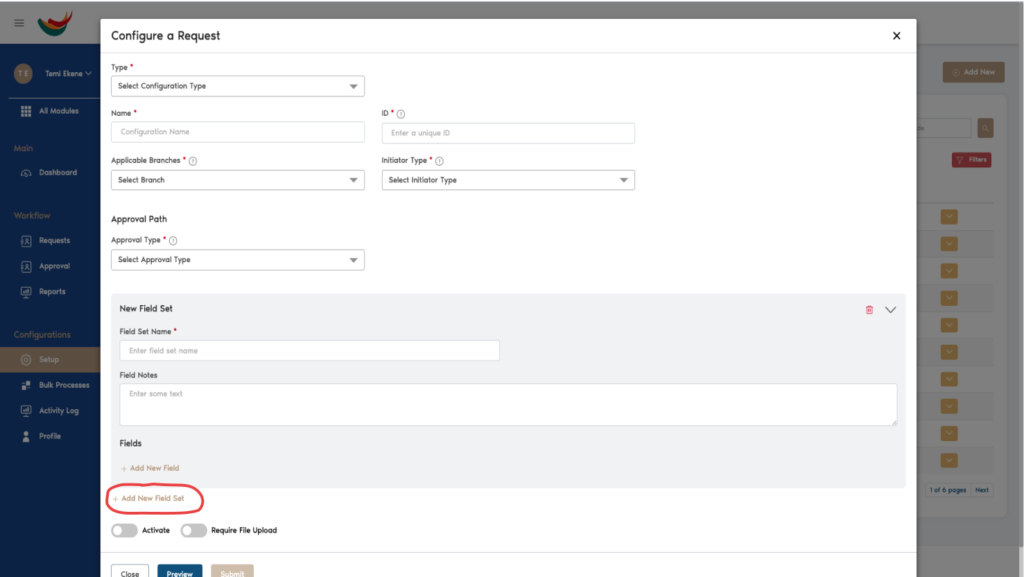
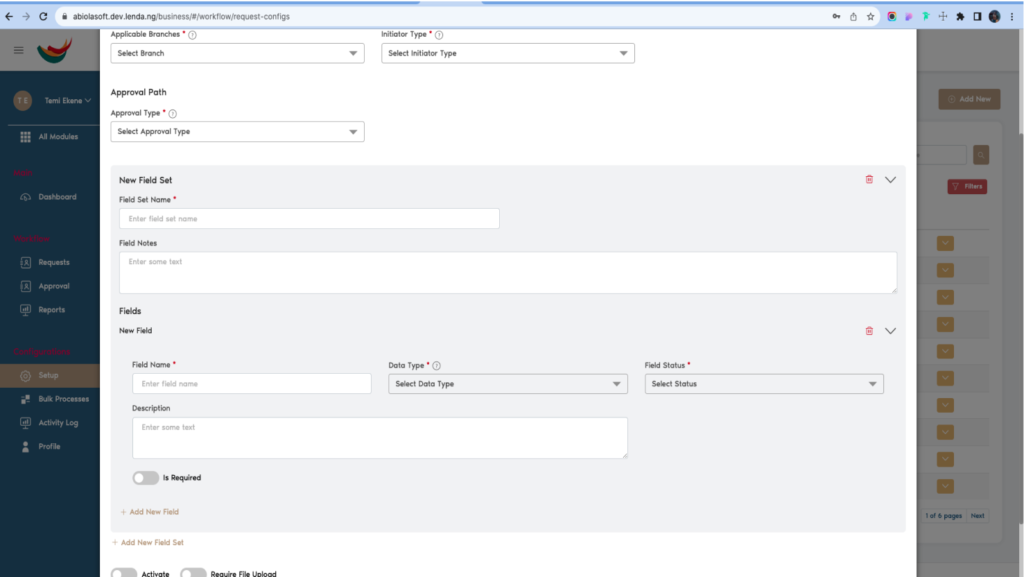
This action populates the following form fields;
Field Name: This is the name of the additional information you want to collect.
Data Type: This indicates what type of data is being collected e.g. free text, date, selection or radio group.
Field Status: This is the status of the information and can either be “activated” or “deactivated”
Description: This tells the user more informations about the field.
Required Toggle: This action adds an asterisk to the field set letting the user know that this data is required and must be fil
After successfully filling all form fields, the user needs to activate the configuration and indicate if the configuration requires a file upload by turning both toggles(highlighted below) on.
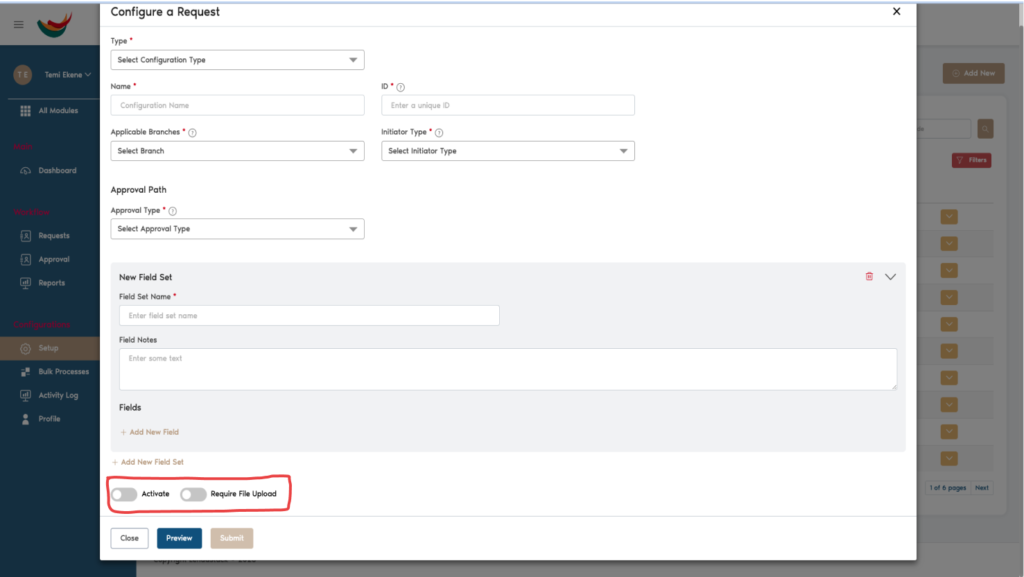
User can choose to either preview the form or submit it. To submit click on the submit button, this saves the configuration and it is ready to be used.
Payment Configuration: This request caters for financial-related requests only. Once a payment request is selected, the screen is populated with a section that tells the user that payment configurations come with some compulsory fields which are; Vendor name, Request Payment Date and request Total Amount.
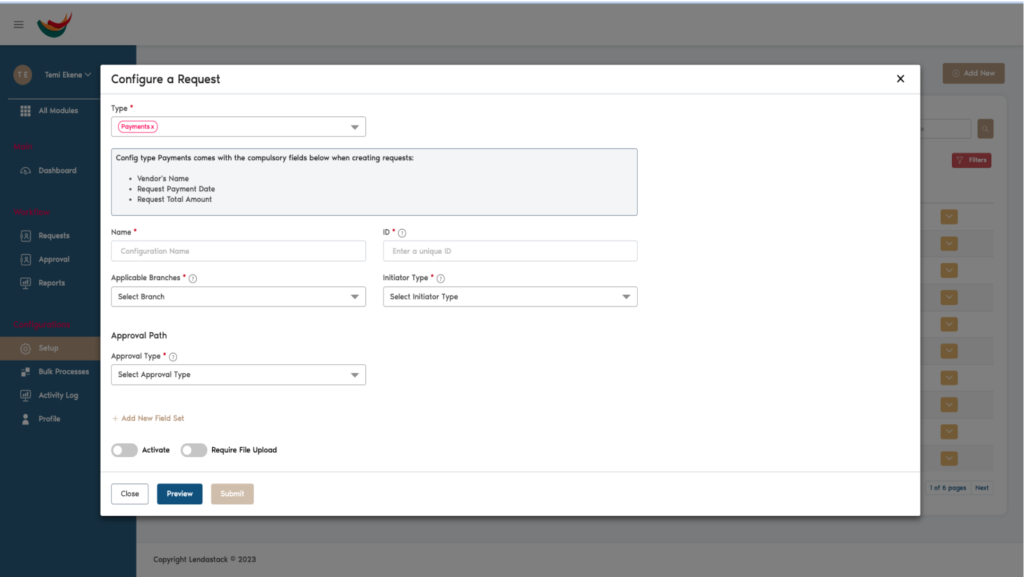
Name: Name your request to help identify eg. (payment for goods bought, Petty cash etc)
ID: Set of alphanumeric codes that makes a request standout
Applicable Branches: List of branches where this configuration can be used
Types of initiator (Team and Role): The class of users that will be able to view the request, you can choose either one but not both
Approval Type: There are different levels of approval access required as follows User, Team and Role are basically as the name stated.
NB: For additional information (if required ), click on the “+Add New Field Set” button highlighted below. This populates the screen with form fields set. Enter a fieldset name and field set note.
Follow the same steps explained for this as explained above under the custom request
After successfully filling all form fields, the user needs to activate the configuration and indicate if the configuration requires a file upload by turning both toggles(highlighted below) on.
