The Lendastack CRM (Customer Relationship Management) module is designed to help businesses manage their customers and cases efficiently from one central platform. It provides a structured way to store customer information, track cases, and ensure that every client interaction is properly documented.
With this module, businesses can easily create, view, and update customer records, as well as log new cases for improved follow-up and faster resolution management.
Key Features
- Centralized Customer Profiles: Easily store and organize all client information, including contact details, customer type, and status, all in one place.
- Lead & Deal Management: Track prospects from initial interest through each stage of your sales pipeline. Visualize progress, prioritize leads, and improve conversion rates with greater efficiency.
Customer Management
The Customer Management feature allows users to create and maintain a complete database of all customers in a structured, easy-to-access format.
Users can choose to add:
- Person Customer: For individual clients.
- Business Customer: For organizations or companies.
Each record includes essential details such as name, contact information, customer type, and status. Users can also view and update existing customer details to ensure data accuracy and consistency.
In addition, new prospects can be added and managed seamlessly, allowing teams to convert prospects to customers once they are onboarded, ensuring a smooth transition and proper documentation.
Creating a New Customer
Creating a new customer is quick and straightforward.
Users with permission to create customers can navigate to the CRM Module by selecting all Modules at the top of the sidebar or from the dashboard upon logging in.

1. In the CRM module, click Customer Management in the sidebar.
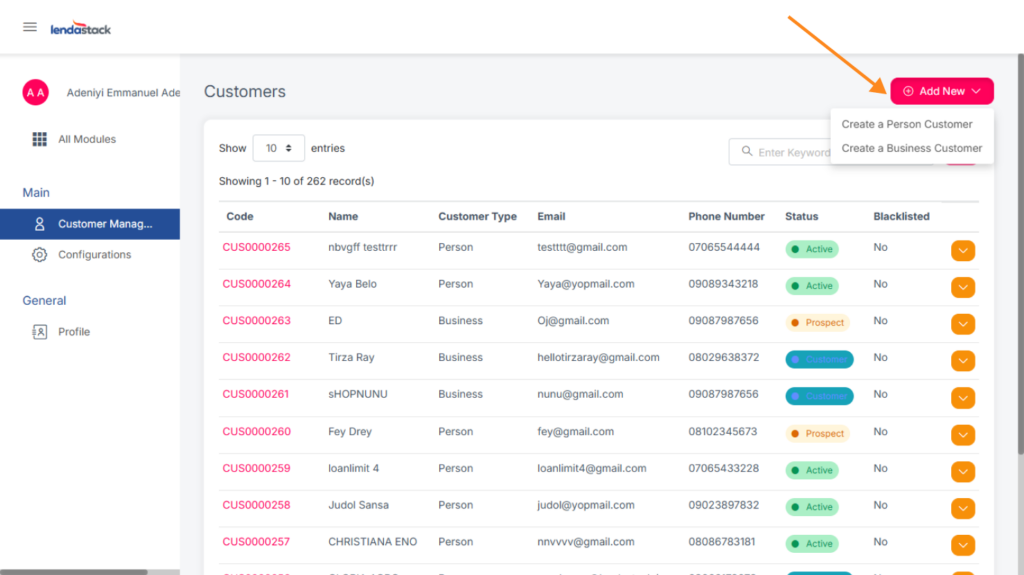
2. Click the Add New button at the top-right corner.

Choose the customer type:
- Person Customer – For individual clients.
- Business Customer – For companies or organizations.
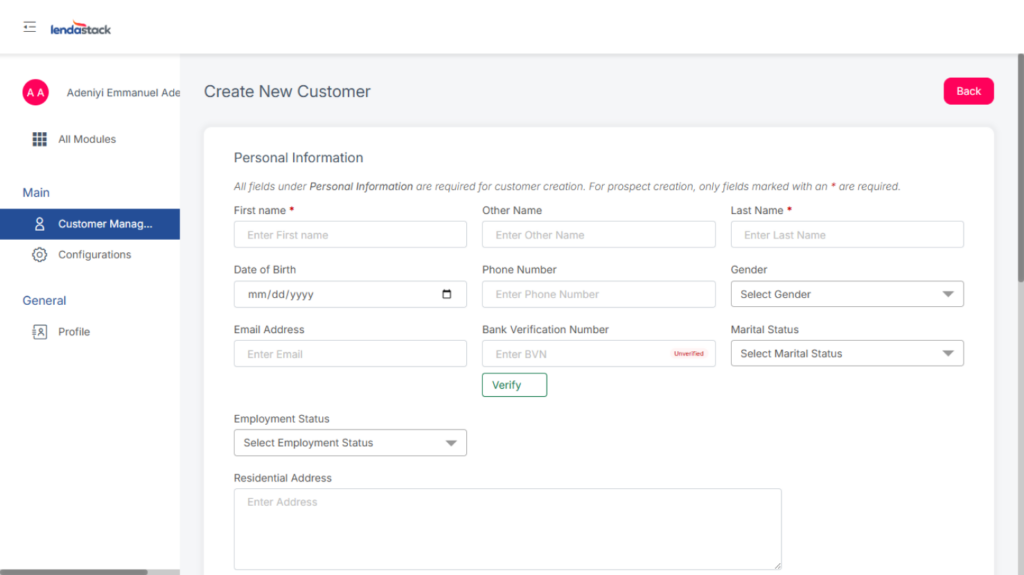
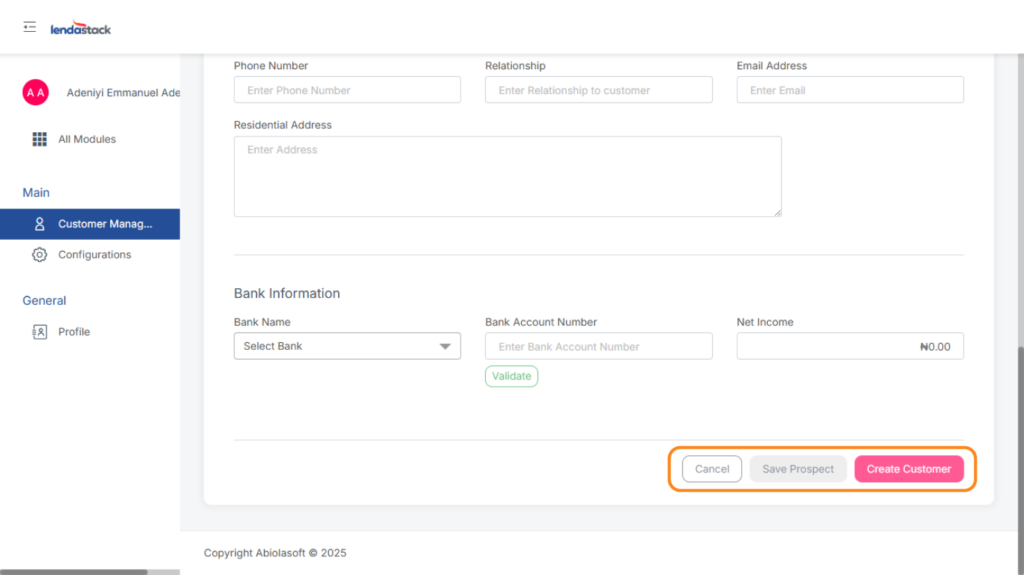
A short bio-data form will appear. Fill in all required (*) fields before saving.
Once saved, the new customer automatically appears in your customer list with a unique Customer Code.
Adding a New Prospect
Only users with the permission to create prospects can add new prospects.
1. Click the Add New button at the top-right corner.
2. Choose the prospect type:
- Person – For individual clients.
- Business – For organizations or companies.

2. Click the Add New button at the top-right corner.


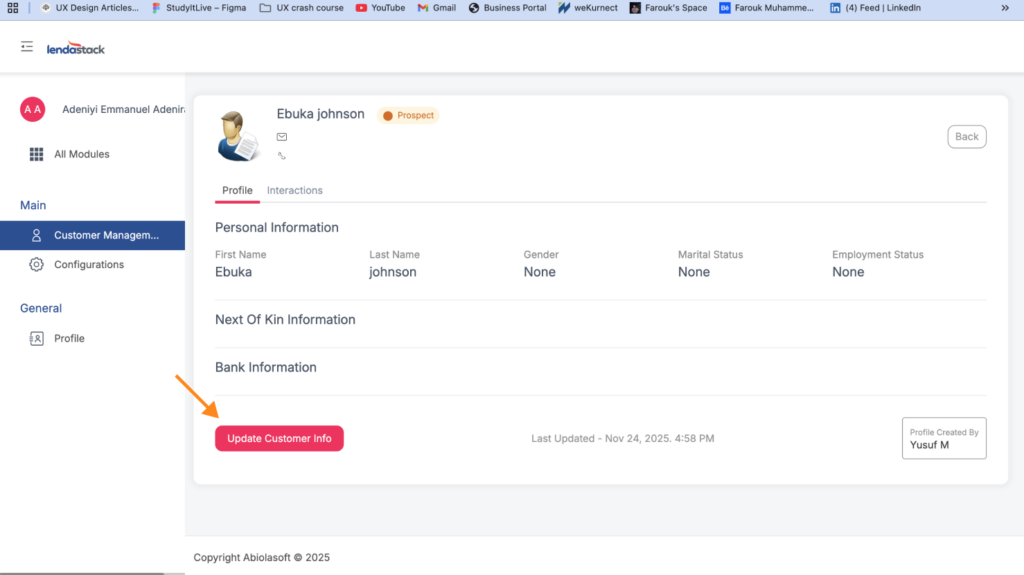
How to Convert a Prospect to a Customer
1. Open the account created for the prospect.
2. Click the Update Customer Info button.
3. Scroll down and select Convert to Customer.

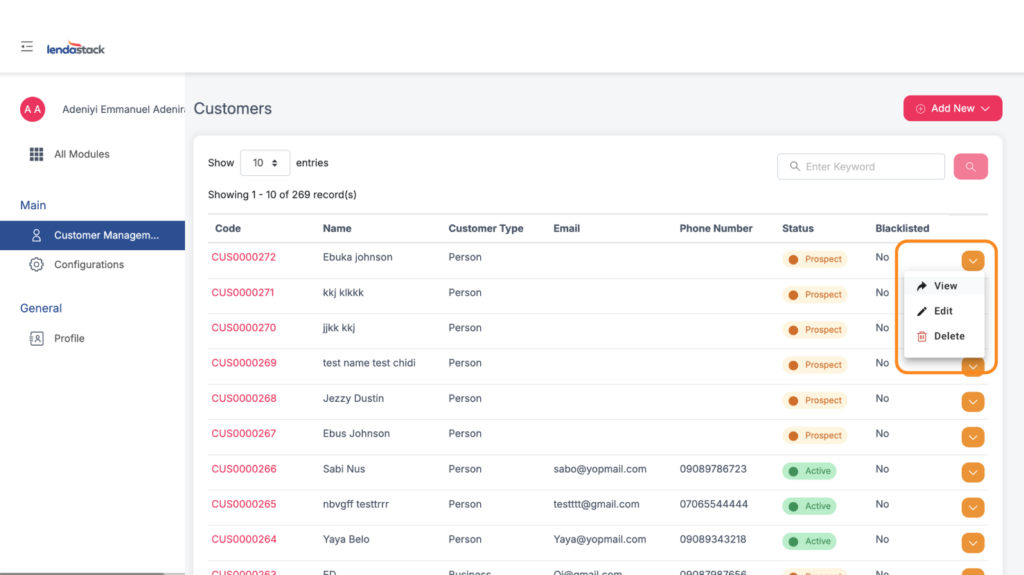
Viewing and Managing Customers
The customer list displays key details for each client, including:
- Customer Code: Unique identifier for each profile.
- Name: Customer or company name.
- Customer Type: Person or Business.
- Email/Contact: Quick access to communication details.
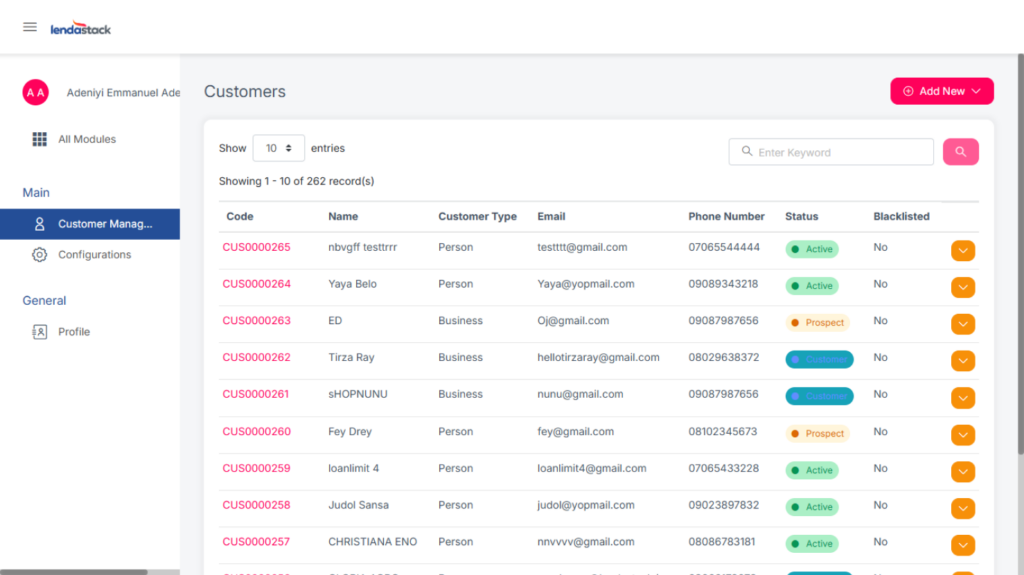
To view or edit details:
- Click the yellow dropdown beside the customer’s record.
- Choose View Details or Edit Information as needed.