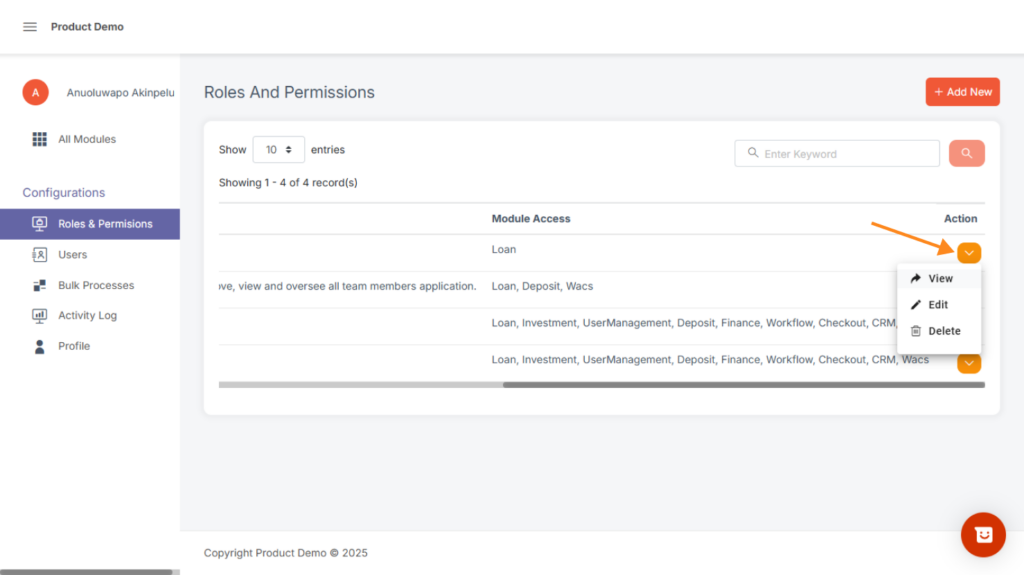
This section allows admins to create and manage different user roles within the system.
Each role can have specific permissions that determine what actions the user can perform.
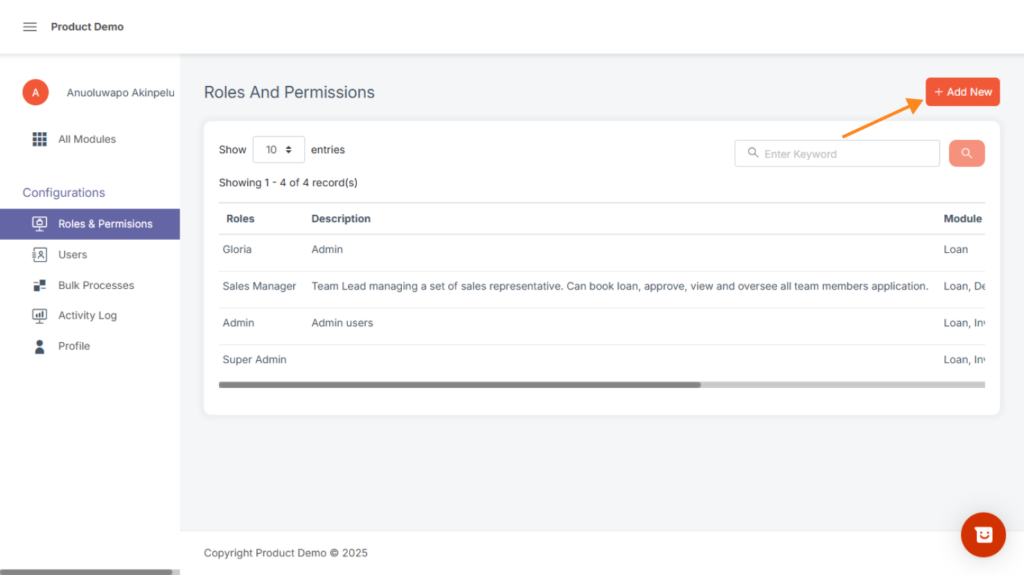
Key Features:
- View a list of all existing roles.
- Add new roles using the “Add New” button.
- Search and filter roles using the keyword field.
- Each role has a description that explains its purpose (e.g., Admin, Sales Manager, Team Lead, Super Admin).
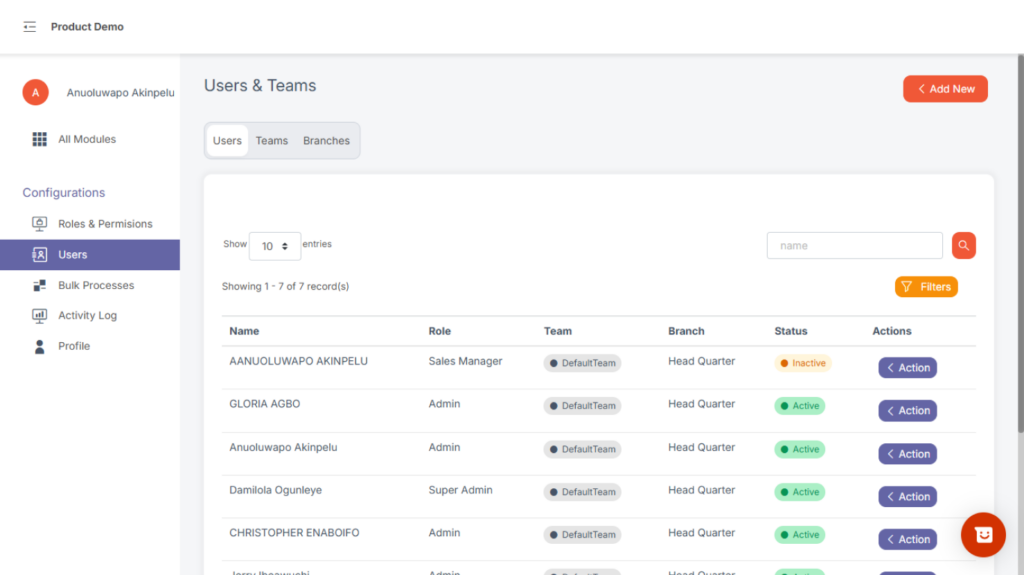
This section provides an overview of all users and teams on the platform.
Admins can easily view user details, assign roles, and organize users into teams or branches.
Key Features:
- Add new users or teams using the “Add New” button.
- Switch between tabs: Users, Teams, and Branches.
- View details such as Name, Role, and Team for each user.
- Use the Filters and Search bar to find specific users.
- Control how many records appear per page using the Show entries option.
How to create a new role #
To create a new role, users with the permission to create role can navigate to the User Management Module using the All Modules option at the top of your sidebar if you’re already in a Module or by choosing it from the modules displayed to you upon logging into Lenda.
When in the User Management Module, click on the Add new at the top right corner of the page. Create Role and assign Permissions to the Role.
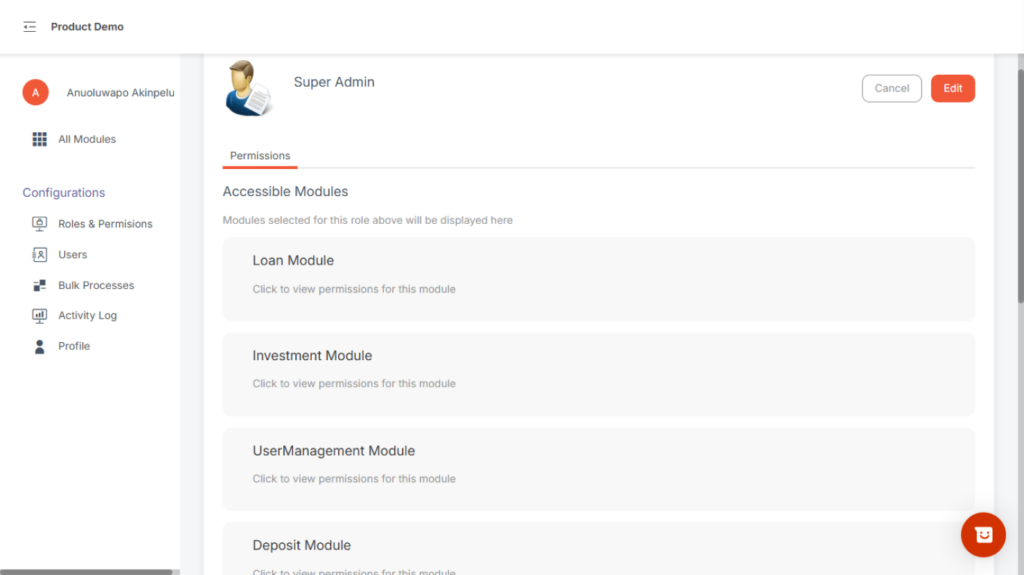
How to increase permissions attached to a role #
To increase permissions attached to a role, users with the permission View Permissions- Update Role can navigate to the User Management Module using the All Modules option at the top of your sidebar if you’re already in a Module or by choosing it from the modules displayed to you upon logging into Lendastack platform.
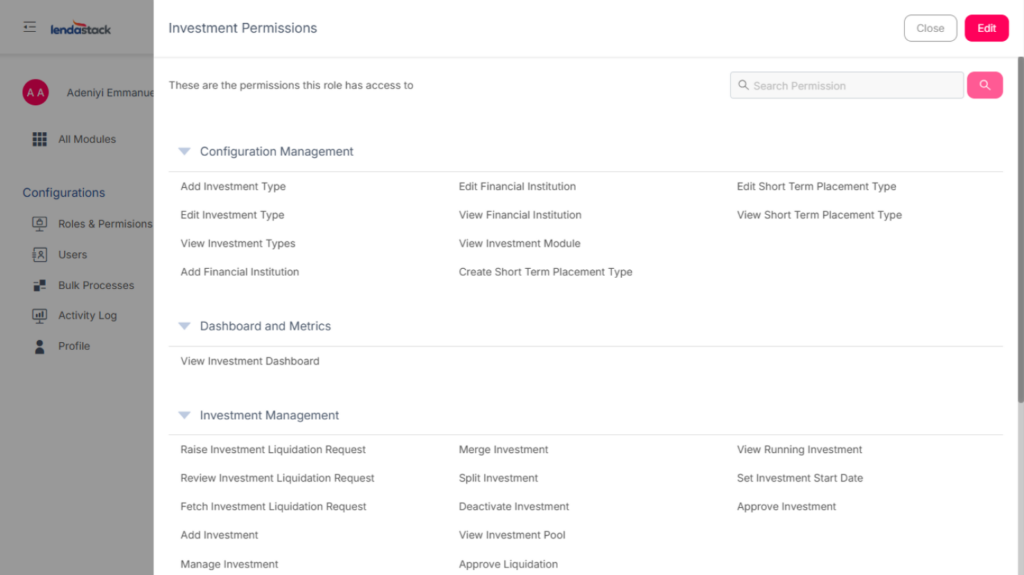
When in the User Management Module , under Roles and Permissions , click on the action button of a role and click edit , then the user will be navigated to the “edit role” form , where the user can add or remove modules the role have access to and also increase or decrease permissions.